Can you winterize an air conditioner? Yes, you absolutely should! Properly winterizing your air conditioner is a crucial step in seasonal HVAC care, ensuring its longevity and optimal performance when the warmer months return. This process protects your unit from harsh weather, prevents damage, and saves you money on costly repairs down the line. What is the best way to prepare AC for winter? By following a series of simple, yet effective steps, you can effectively winterize your air conditioner, turning a potentially vulnerable piece of equipment into a resilient one ready for the next cooling season.
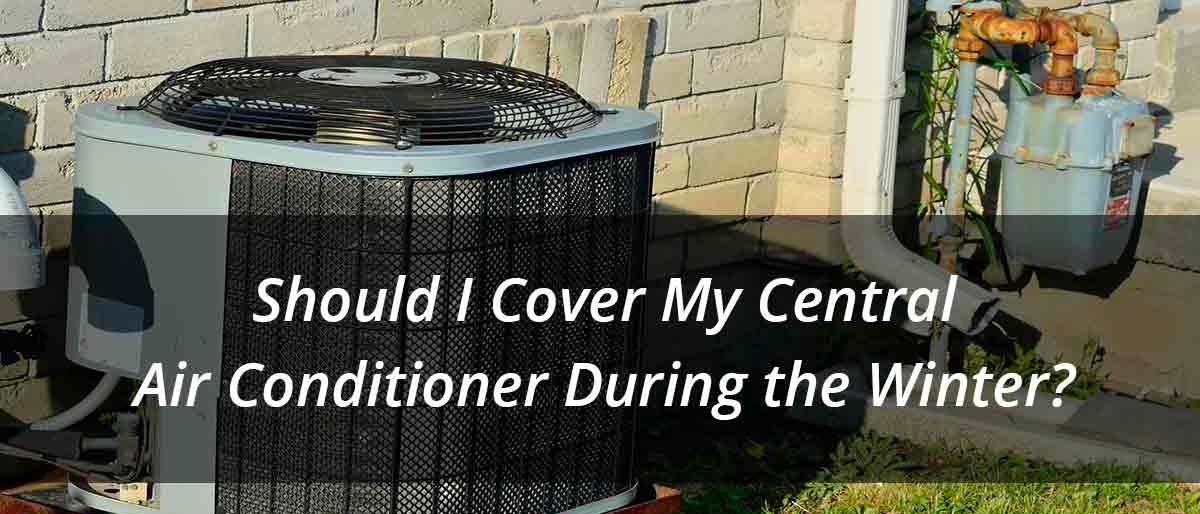
Image Source: www.jdsplumbingservice.com
Why Winterizing Your Air Conditioner Matters
When winter arrives, your air conditioner goes into hibernation. Unlike a furnace that works hard throughout the cold months, your AC unit sits idle outdoors, exposed to the elements. This exposure can lead to significant damage if proper precautions aren’t taken. Snow, ice, freezing rain, and even strong winds can wreak havoc on exposed components.
Here’s why taking the time to winterize is so important:
- Prevents Frost Damage: Water trapped in pipes or coils can freeze and expand, causing cracks or bursts. This is particularly true for the refrigerant lines.
- Protects Against Debris: Leaves, twigs, dirt, and other debris can accumulate inside the unit, potentially clogging crucial parts and fostering corrosion.
- Shields Against Rodents and Pests: Small animals may seek shelter in the warm, protected interior of your AC unit during winter. Their nesting activities can obstruct airflow and damage wiring.
- Reduces Corrosion: Exposure to moisture and salt (especially in coastal or de-iced road areas) can accelerate the corrosion of metal components, weakening the unit.
- Maintains Efficiency: By keeping the unit clean and protected, you ensure that when spring comes, your AC can operate at peak efficiency without needing to overcome winter-induced issues.
- Saves Money: Preventing damage through winterization is far cheaper than repairing or replacing a damaged AC unit.
Think of it like storing a valuable piece of equipment. You wouldn’t leave a bicycle out in the snow all winter without covering it, would you? Your air conditioner deserves the same care.
Essential Steps for Winter AC Storage
Preparing your AC for winter involves a few key actions. These steps ensure that all potential vulnerabilities are addressed, providing your unit with the best possible protection.
Step 1: The Crucial Disconnect
Before you do anything else, it’s paramount to disconnect the power to your air conditioner. This is a critical safety measure. You don’t want the unit to accidentally cycle on while you’re working on it.
How to Disconnect AC Power
- Locate the Disconnect Switch: In most homes, there will be a dedicated switch or breaker for the air conditioner. This is often a separate switch box located on the exterior wall near the AC unit itself. It might be a lever or a pull-out fuse block.
- Locate the Circuit Breaker: Alternatively, you might have a dedicated circuit breaker in your home’s main electrical panel. Look for a breaker labeled “AC,” “Air Conditioner,” or a similar designation.
- Turn Off the Power:
- For a Disconnect Switch: Firmly pull the lever down or remove the fuse block. Ensure it’s completely disengaged.
- For a Circuit Breaker: Flip the breaker switch to the “OFF” position.
- Verify Power is Off: For extra safety, use a non-contact voltage tester to ensure there is no power flowing to the unit. Touch the tester to the wires leading into the unit. If it lights up or beeps, power is still present, and you need to find the correct shut-off. Never work on electrical equipment without ensuring the power is completely off.
This step is non-negotiable for your safety and the integrity of your AC unit.
Step 2: Cleaning Your Air Conditioner
A clean air conditioner is a happy air conditioner, especially when preparing for a long, inactive period. Removing dirt, dust, and debris prevents it from becoming embedded and causing damage during the winter. This is a vital part of clean air conditioner upkeep.
Cleaning the Outdoor Unit (Condenser)
- Clear the Area: Remove any leaves, grass clippings, or debris from around the base of the unit.
- Remove the Top Fan Grill (Optional but Recommended):
- Safety First: Ensure the power is OFF.
- Access the Screws: The top grill is usually held in place by screws. Carefully remove these screws using an appropriate screwdriver. Some units may have clips instead.
- Lift the Grill: Gently lift the grill and set it aside. Be mindful of any wires connected to the fan motor. You might be able to let it rest on the fan blades without disconnecting wires, or you may need to disconnect a plug. If you disconnect, remember how it goes back together.
- Clean the Fins: The metal fins surrounding the unit can accumulate dirt and grime.
- Gentle Washing: Use a garden hose with a spray nozzle to gently wash the fins from the inside out. This pushes debris away from the unit. Avoid high-pressure washers, as they can bend the delicate fins.
- Fin Comb (Optional): For stubborn dirt or bent fins, a specialized fin comb can be used carefully to straighten them.
- Clean the Fan Blades: With the grill removed, you can access the fan blades. Wipe them down with a damp cloth to remove dust and debris.
- Clean the Base: Remove any accumulated leaves or dirt from the bottom of the unit.
Cleaning the Indoor Unit (Evaporator Coil – if accessible and comfortable)
While the outdoor unit is the primary focus for winterization, a quick clean of the indoor unit’s air filter is always good practice. If you feel comfortable and your unit allows for easy access to the evaporator coil (often found in the air handler or furnace), a light dusting can be beneficial.
- Check and Replace Air Filter: This is a crucial part of general AC maintenance. A dirty filter restricts airflow and can put unnecessary strain on your system. Replace it with a clean one before winter.
- Evaporator Coil Wipe-Down: If you can safely access the evaporator coil (often behind a panel in your furnace or air handler), use a soft brush or vacuum attachment to gently remove dust. Do not spray water into the indoor unit.
Step 3: Draining the AC Unit
This is a critical step to prevent freeze damage. Water left in the condensate drain line can freeze and expand, cracking the line or even damaging the internal components of the air handler.
How to Drain AC Unit Properly
- Locate the Condensate Drain Line: This is typically a PVC pipe that runs from your indoor evaporator coil to a drain or outside. You might also see a condensate pump if your unit is below the drain level.
- Clear the Drain Line:
- For Standard Drains: You can often use a wet/dry vacuum attached to the end of the drain line (usually where it exits the house or at a clean-out T-fitting) to suck out any standing water.
- For Condensate Pumps: Ensure the pump’s reservoir is empty. Some pumps have a small hose you can use to drain it.
- Use a Shop-Vac: The most effective way to drain AC unit is to use a shop vacuum.
- Find the end of the drain line. If it’s a vertical pipe with a cap, remove the cap. If it has a T-fitting, that’s a good place to attach the vacuum.
- Seal the connection between the vacuum hose and the drain line as best you can (duct tape can help).
- Turn on the shop vacuum and let it run for a few minutes. This will pull most of the water out of the line and the coil’s drain pan.
- Pouring Bleach/Vinegar (Optional Pre-Winter Maintenance): Some people pour a cup of diluted bleach or vinegar down the drain line before vacuuming to kill algae and bacteria. However, for pure winterization, simply ensuring it’s empty is the priority.
Properly draining the unit is a key element of preparing AC for winter.
Step 4: Protecting the Unit from the Elements
Now that the unit is clean and drained, it’s time to shield it from winter’s onslaught. This involves two main approaches: covering and protecting the fan.
Using a Winter AC Cover
A winter AC cover is a specialized product designed to protect your outdoor unit. These covers are usually made of durable, waterproof material and are designed to fit snugly over the top of the condenser unit.
- Benefits of a Cover:
- Keeps out snow, ice, leaves, and debris.
- Prevents rodents from nesting inside.
- Protects the fan motor and electrical components from moisture.
- Types of Covers:
- Full Covers: These cover the entire unit. Ensure they are breathable or have ventilation to prevent moisture buildup and corrosion.
- Cap Covers: These simply cover the top of the unit, protecting the fan motor and coil from direct precipitation. This is often preferred as it still allows air to circulate around the sides, reducing moisture issues.
- How to Install a Cover:
- Choose the Right Size: Select a cover that is specifically designed for your unit’s size and shape.
- Secure It Properly: Most covers have straps or bungee cords to secure them tightly. Ensure the cover is taut and won’t blow off in the wind.
- Consider Ventilation: If using a full cover, make sure it has some form of ventilation to allow air to escape. Trapped moisture can be more damaging than exposure to light elements. Some covers have built-in vents.
Protecting the Fan
The fan blades are particularly vulnerable to damage from ice and debris.
- Covering the Fan: A common recommendation is to cover the fan opening at the top of the unit.
- Materials: You can use a piece of plywood, a sturdy tarp, or a specialized fan cover.
- Securing: Secure the cover tightly to prevent wind from lifting it or debris from getting underneath. If using plywood, ensure it’s cut to size and secured with bungee cords or screws (be careful not to overtighten and strip the unit’s casing).
- Why Protect the Fan? This prevents snow and ice from accumulating directly on the fan blades and motor. It also stops small animals from using the fan opening as an entry point.
Important Note on Covers: While a cover is essential, ensure it doesn’t trap excessive moisture. Some HVAC professionals recommend leaving the sides of the unit exposed for better air circulation, focusing only on covering the top. Always follow the manufacturer’s recommendations for your specific unit and cover.
Step 5: Final Checks and Considerations
Before you declare your AC unit winterized, there are a few final checks to ensure you’ve covered all bases. This is part of comprehensive seasonal HVAC care.
- Inspect Wiring: Briefly look at any exposed wiring. Ensure there are no signs of damage from pests or corrosion.
- Check the Level: Make sure the unit is still sitting level on its pad. Extreme weather can sometimes shift outdoor units.
- Secure Loose Panels: If any panels on your unit feel loose, secure them.
- Remove Debris from Pad: Clear away any remaining leaves or debris from the concrete pad the unit sits on.
This thorough approach to air conditioner storage will serve your unit well throughout the winter.
What About Ductless Mini-Splits?
Ductless mini-split systems have an outdoor unit similar to a central AC unit, but they operate a bit differently and have specific winterization needs.
Winterizing Mini-Split Outdoor Units
- Clean the Unit: As with central AC, clean the outdoor unit of debris.
- Disconnect Power: Turn off the power to the outdoor unit at the breaker.
- Cover the Unit: A winter AC cover or a breathable tarp is recommended for the outdoor unit. This protects the fan and internal components from snow and ice. Ensure adequate ventilation to prevent moisture buildup.
- Check the Drain: Ensure the condensate drain line for the outdoor unit is clear.
Indoor Units (Air Handlers/Evaporators)
- Set to Fan Mode: If your mini-split has a heating function, you can leave the indoor unit on for heating. If it’s solely an air conditioner or you don’t plan to use it for heat, you can simply turn it off at the remote.
- Filter Maintenance: Clean or replace the air filters in the indoor units.
Frequently Asked Questions (FAQ)
Q1: Do I really need to cover my air conditioner in winter?
Yes, it is highly recommended to cover your air conditioner in winter. While some units are built to withstand the elements, covering them provides an extra layer of protection against snow, ice, debris, and pests, preventing potential damage and extending the unit’s lifespan.
Q2: Can I leave my air conditioner on all winter?
No, you should not leave your air conditioner on all winter if it’s not designed for heating. Running an AC unit in freezing temperatures can cause significant damage to the compressor and other internal components due to the refrigerant cycle.
Q3: What is the best way to protect AC outdoors?
The best way to protect AC outdoors during winter is to combine thorough cleaning, draining of all water, and covering the unit, especially the fan. A dedicated winter AC cover or a sturdy, secured tarp can provide essential protection from snow, ice, and debris.
Q4: How do I know if my AC unit is properly winterized?
Your AC unit is properly winterized if you have:
* Turned off and disconnected the power.
* Cleaned all external components.
* Drained all water from the condensate lines and unit.
* Secured a protective cover over the top or entire unit, ensuring some ventilation.
* Removed any debris from around and inside the unit.
Q5: Can I disconnect AC power myself?
Yes, if you are comfortable with basic electrical safety. Locate the dedicated circuit breaker or disconnect switch for your AC unit and turn it off. If you are unsure, it’s always best to consult a qualified HVAC technician.
Q6: What happens if I don’t winterize my air conditioner?
If you don’t winterize your air conditioner, it can suffer damage from freezing water, corrosion from moisture, and potential damage from pests or debris. This can lead to costly repairs or even premature replacement when you need it again in the spring.
Q7: How often should I perform AC maintenance?
General AC maintenance should be performed at least once a year, ideally in the spring before the cooling season begins. This includes cleaning, filter replacement, and professional checks. Winterization is a specific type of seasonal maintenance.
Q8: Can I use a regular tarp to cover my AC unit?
Yes, you can use a regular tarp, but ensure it’s a heavy-duty, waterproof one and that it is secured very tightly with bungee cords or rope. It’s also crucial to allow for ventilation to prevent moisture buildup. Specialized winter AC cover options are often designed with these factors in mind.
Q9: Do I need to do anything to the refrigerant lines?
Generally, no special treatment is needed for the refrigerant lines themselves as part of standard winterization, provided the unit is properly drained and protected from the elements. The primary concern is preventing water from freezing within any part of the system, which the draining process addresses.
Q10: When should I winterize my air conditioner?
You should winterize your air conditioner after the first frost and once you’re confident that you won’t need it for cooling again until spring. Typically, this is sometime in late fall or early winter, depending on your climate.
Conclusion
Winterizing your air conditioner is not an overly complicated task, but it is a crucial one. By following these simple steps for seasonal HVAC care, you are investing in the long-term health and efficiency of your cooling system. Taking the time to clean air conditioner components, drain AC unit lines, disconnect AC power safely, and properly protect AC outdoors with a winter AC cover will ensure your unit weathers the winter months without succumbing to damage. This diligent AC maintenance and proper air conditioner storage will pay dividends when the first hot day of spring arrives, and your AC unit is ready to perform as it should, efficiently and reliably.
My name is Carlos Gadd, and I am the creator of AirPurityGuide.com.. With a passion for footwear, I share my experiences, insights, and expertise about shoes. Through my blog, I aim to guide readers in making informed decisions, finding the perfect pair, and enhancing their footwear knowledge. Join me on this journey to explore everything about shoes!