What is the purpose of an air conditioner? An air conditioner cools the air inside a room or building. Can I turn on my AC if it’s already cold outside? Yes, you can turn on your AC, but it’s not recommended if the outside temperature is below your desired inside temperature, as it won’t be effective and could potentially damage the unit. Who is responsible for maintaining an air conditioner? The homeowner or tenant is typically responsible for regular maintenance like filter changes, while professional maintenance is usually handled by the property owner or landlord.
Getting your air conditioner (AC) to blow cool air is a fundamental step to staying comfortable during warm weather. While modern AC systems can seem complex, the basic process of turning one on is usually quite straightforward. This guide will walk you through the simple steps to get your AC running, covering different types of systems and common situations.
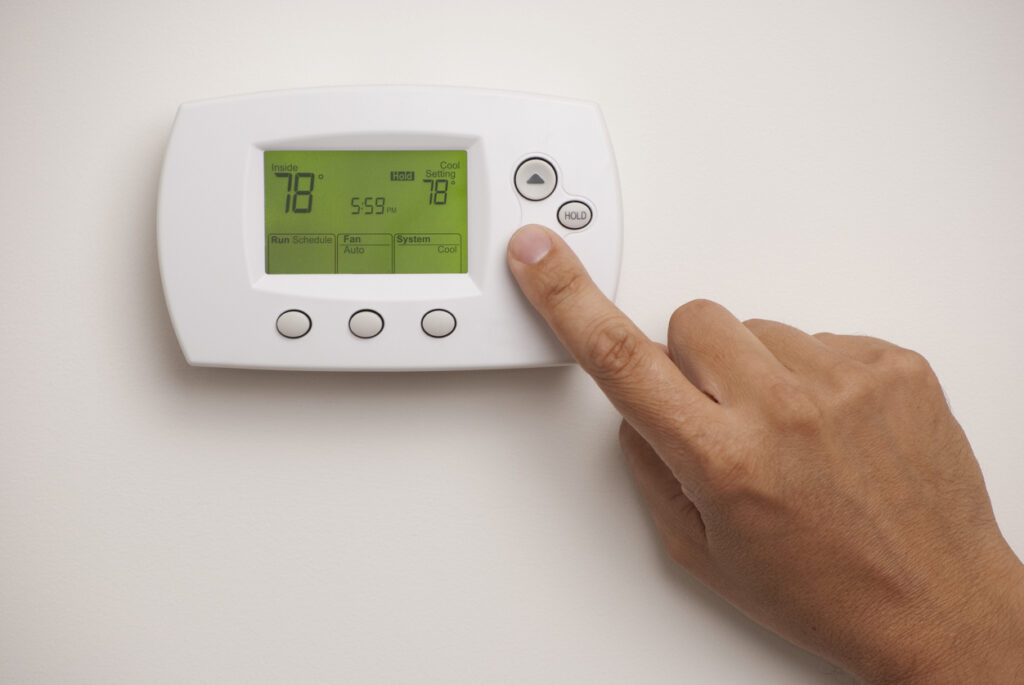
Image Source: www.callroth.com
Finding Your Control Center: The Thermostat
The first place to start when you want to turn on your air conditioner is to locate thermostat. This device is the brain of your cooling system, allowing you to control the temperature and modes of operation. Thermostats come in various forms:
- Manual Thermostats: These are older, simpler models with dials or sliders to set the temperature and fan.
- Programmable Thermostats: These allow you to set schedules for different times of day and days of the week, saving energy.
- Smart Thermostats: These connect to Wi-Fi and can be controlled remotely via smartphone apps, offering advanced features like learning your habits and integrating with other smart home devices.
Types of Thermostats and Their Operation
| Thermostat Type | How to Adjust Settings | Key Features |
|---|---|---|
| Manual | Turn dial or slide lever to desired temperature. | Simple to use, basic temperature control. |
| Programmable | Use buttons or touchscreen to set daily/weekly schedules. | Energy savings through timed operation, customizable comfort. |
| Smart | Use smartphone app, voice commands, or touch interface. | Remote control, energy monitoring, learning capabilities, smart home integration. |
The Essential First Step: The AC Power Button
Before you can adjust temperature settings, you need to make sure your air conditioner has power. For central air conditioning systems, the main power source is usually controlled by a switch located near the main electrical panel (breaker box) or sometimes on the unit itself.
Finding the AC Power Switch
- Breaker Box: Look for a breaker switch labeled “AC,” “Air Conditioner,” “HVAC,” or a similar designation. Ensure this breaker is in the “ON” position. If it’s tripped (usually halfway between ON and OFF), flip it completely to “OFF” and then back to “ON.”
- Emergency AC Power: In some cases, particularly with larger systems or older homes, there might be a dedicated disconnect switch near the outdoor condenser unit. This is often a metal box with a pull-out handle or a breaker. This switch should also be in the “ON” position. Having reliable emergency AC power ensures your unit can operate when needed most.
For window unit operation, the power source is typically a standard electrical outlet. Ensure the unit is securely plugged in. Some window units also have a main power switch directly on the unit itself, often near the controls.
Turning On Your Air Conditioner: Step-by-Step
Once you’ve located your thermostat and confirmed the AC has power, you can proceed with turning it on.
Step 1: Powering Up the System
- For Central AC: If your thermostat has an “ON/OFF” switch or power button, make sure it’s set to “ON.”
- For Window Units: Ensure the unit is plugged in and that any main power switch on the unit is engaged.
Step 2: Selecting the Cooling Mode
Your thermostat will likely have a mode selection switch or button. You need to choose the “COOL” setting. Other common modes include:
- HEAT: For heating in cooler months.
- AUTO: The system automatically switches between heating and cooling based on the set temperature and ambient conditions.
- EMERGENCY HEAT (for heat pumps): This uses a backup heating element when the heat pump cannot maintain the desired temperature.
- FAN: This circulates air without cooling or heating. You can often choose between “AUTO” (fan runs only when cooling/heating) and “ON” (fan runs continuously).
Step 3: Adjusting the Temperature Settings
This is where you tell the AC what temperature you want the room to be. You will adjust temperature settings by:
- Manual Thermostats: Turning the dial or moving the lever to your desired degree.
- Digital/Programmable/Smart Thermostats: Pressing up or down arrows, using a touchscreen, or setting the temperature via an app.
Tip: For initial cooling on a very hot day, it’s often best to set the temperature a few degrees lower than your ultimate target. Once the room has cooled significantly, you can then raise it to your preferred, more energy-efficient setting.
Step 4: Setting the Fan Speed Control
Most AC systems allow you to control the fan speed. You can usually choose from:
- LOW: Quieter operation, gentler airflow.
- MEDIUM: A balance between noise and airflow.
- HIGH: Maximum airflow, cools the room faster but can be noisier.
- AUTO: The fan speed adjusts automatically based on the system’s needs.
The fan speed control can significantly impact how quickly the room cools and the overall comfort level. Experiment to find what works best for you.
Step 5: Confirming Operation
Once you’ve made your selections, give the system a few minutes to start up. You should hear the outdoor unit (condenser) kick on and feel cool air coming from the vents (for central systems) or the front of the window unit.
Specifics for Different AC Types
While the general principles are the same, there are nuances for different types of air conditioners.
Window Unit Operation
Window AC units are self-contained and designed to cool a single room.
- Plug It In: Ensure the unit is securely plugged into a properly grounded electrical outlet.
- Find the Controls: These are usually on the front panel of the unit. Look for a power button or switch.
- Select Mode: Choose “COOL.”
- Set Temperature: Use the temperature dial or buttons to set your desired comfort level.
- Adjust Fan Speed: Select your preferred fan speed.
- Check Vents: Ensure the air vents on the unit are open and not blocked.
Important Note for Window Units: Always ensure the unit is installed correctly and securely in the window, with proper support and sealing to prevent air leaks.
Portable Air Conditioner Operation
Portable AC units are similar to window units but sit on the floor and vent hot air through a hose connected to a window kit.
- Connect the Hose: Attach the exhaust hose to the back of the unit and the window kit.
- Position the Window Kit: Place the window kit in an open window and secure it.
- Plug It In: Connect the power cord to a suitable outlet.
- Control Panel: Locate the control panel on the unit. It will have modes, temperature settings, and fan speed controls.
- Select Mode: Choose “COOL.”
- Set Temperature: Adjust to your desired setting.
- Fan Speed: Select your preferred fan speed.
- Drainage: Be mindful of drainage. Most units have a water tank that needs to be emptied periodically, or a continuous drain option.
Mini-Split (Ductless) Air Conditioner Operation
Mini-split systems have an indoor unit and an outdoor unit connected by refrigerant lines and electrical wiring, offering flexible cooling for specific zones.
- Remote Control AC: Mini-splits are almost exclusively operated by a remote control AC. Make sure the remote has fresh batteries.
- Power On: Press the power button on the remote.
- Mode Selection: Choose “COOL” mode.
- Temperature Adjustment: Use the up/down arrows on the remote to adjust temperature settings.
- Fan Speed: Select your desired fan speed.
- Swing Function: Many mini-splits have an adjustable louvre (swing function) to direct airflow. You can set it to oscillate or direct air to a specific spot.
Smart AC Setup
For smart AC setup, the initial process involves connecting your smart thermostat or smart AC unit to your home Wi-Fi network and pairing it with its dedicated mobile app.
- Download the App: Find the manufacturer’s app for your smart thermostat or AC unit.
- Create an Account: Follow the app’s instructions to create an account.
- Connect to Wi-Fi: The app will guide you through connecting your device to your home Wi-Fi network. This often involves entering your Wi-Fi password.
- Device Pairing: Once connected to Wi-Fi, the app will help you “discover” and pair your AC unit or thermostat.
- Configuration: You can then set your preferred schedules, adjust temperature settings remotely, monitor energy usage, and utilize other smart features.
Troubleshooting Common Issues: AC Not Turning On
Sometimes, despite following the steps, your AC might not turn on. Here’s a guide for troubleshooting AC not turning on:
Table: Common AC Troubleshooting Steps
| Problem | Possible Cause | Solution |
|---|---|---|
| No power at all | Tripped circuit breaker. | Check your home’s breaker box. Find the breaker for the AC and reset it. If it trips again immediately, there may be a more serious electrical issue, and you should call an electrician. |
| Blown fuse (less common in modern systems). | Check the fuse box if applicable. | |
| Power switch near the unit is off. | Locate any disconnect switch near the indoor air handler or outdoor condenser unit and ensure it is in the “ON” position. | |
| Unit is unplugged (window/portable units). | Ensure the power cord is securely plugged into a working outlet. | |
| Thermostat is blank | No power to the thermostat. | Check the circuit breaker for the HVAC system. Some thermostats require a C-wire (common wire) for continuous power; if this wire isn’t connected or is faulty, the thermostat may not work. Check the battery if your thermostat uses them. |
| Thermostat is not communicating with the system. | Some thermostats have a cover that needs to be securely attached to make proper contact. Gently remove and reattach it. | |
| Unit powers on but doesn’t cool | Dirty air filter. | A clogged filter restricts airflow, reducing cooling efficiency. Replace or clean the air filter. This is a very common issue. |
| Thermostat set incorrectly. | Ensure the thermostat is set to “COOL” mode and the temperature is set lower than the current room temperature. | |
| Outdoor unit (condenser) is dirty or blocked. | The outdoor unit needs to dissipate heat. Ensure the area around it is clear of debris, plants, and any obstructions. Gently hose down the fins if they are dirty, but avoid high pressure. | |
| Refrigerant leak. | If you notice ice buildup on the refrigerant lines or if the unit blows warm air despite proper settings, it could be a refrigerant issue. This requires a professional HVAC technician. | |
| Condensate drain line is clogged. | When ACs cool air, they also remove humidity, creating condensation. If the drain line clogs, a safety switch might shut off the system to prevent water damage. Check and clear the drain line. | |
| Window unit powers on but no air | Fan motor issue. | The fan motor might be broken or have a failed capacitor. This requires professional repair. |
| Airflow is blocked internally. | Check if the internal filters or coils are excessively dirty. |
Energy Saving Tips
Once your AC is running, consider these tips to save energy and money:
- Set a Smart Schedule: Use programmable or smart thermostats to cool your home only when needed.
- Adjust Temperature Gradually: Avoid drastic temperature changes. A few degrees higher can save significant energy.
- Maintain Your System: Regular professional maintenance ensures your AC runs efficiently. Clean or replace air filters monthly.
- Seal Air Leaks: Ensure windows and doors are properly sealed to prevent cool air from escaping.
- Use Fans: Ceiling fans or portable fans can help circulate cool air, allowing you to set the thermostat a few degrees higher while still feeling comfortable.
- Use Curtains and Blinds: Close blinds and curtains during the hottest parts of the day to block solar heat gain.
Frequently Asked Questions (FAQ)
Q1: How long does it take for my AC to cool my house?
A1: It typically takes 30 minutes to an hour for an AC to start making a noticeable difference, and several hours to reach the desired temperature, depending on the size of your home, the AC’s capacity, insulation, and how hot it is outside.
Q2: My AC is blowing warm air. What should I do?
A2: First, check your thermostat settings to ensure it’s on “COOL” and the temperature is set appropriately. Then, inspect your air filter for blockages. If these basic checks don’t resolve the issue, it’s likely a more complex problem like a refrigerant leak or a faulty component, and you’ll need to call a professional.
Q3: Can I use my AC when it’s very cold outside?
A3: It’s generally not recommended to run your air conditioner when the outside temperature is below 60-65°F (16-18°C). Modern air conditioners, especially those with heat pumps, can be damaged by attempting to cool when it’s too cold outside.
Q4: What is a C-wire, and do I need one?
A4: A C-wire (common wire) provides continuous 24V power to your thermostat. Many smart thermostats require a C-wire to operate reliably. If your thermostat display is blank or it keeps losing power, you might need to have a C-wire installed.
Q5: How often should I change my air filter?
A5: It’s recommended to check and replace or clean your air filter every 1 to 3 months, depending on the type of filter and your home’s environment (e.g., pets, allergies, dust levels). A dirty filter significantly reduces efficiency and can strain your system.
By following these simple steps and tips, you can effectively turn on your air conditioner and maintain a comfortable indoor environment throughout the warmer months. Remember that regular maintenance is key to ensuring your AC runs efficiently and lasts for years to come.
My name is Carlos Gadd, and I am the creator of AirPurityGuide.com.. With a passion for footwear, I share my experiences, insights, and expertise about shoes. Through my blog, I aim to guide readers in making informed decisions, finding the perfect pair, and enhancing their footwear knowledge. Join me on this journey to explore everything about shoes!