Turning on your air conditioner might seem simple, but knowing the right steps ensures efficient cooling and helps prevent issues with your system. You turn on your air conditioner by using its remote control or the wall-mounted thermostat to set your desired temperature and fan speed, and then ensuring the main power switch for the AC unit is in the “on” position. This guide will walk you through the entire process, covering everything from initial power checks to using your remote or thermostat for optimal air conditioning operation. We’ll also touch on basic air conditioner maintenance that can help keep your unit running smoothly.
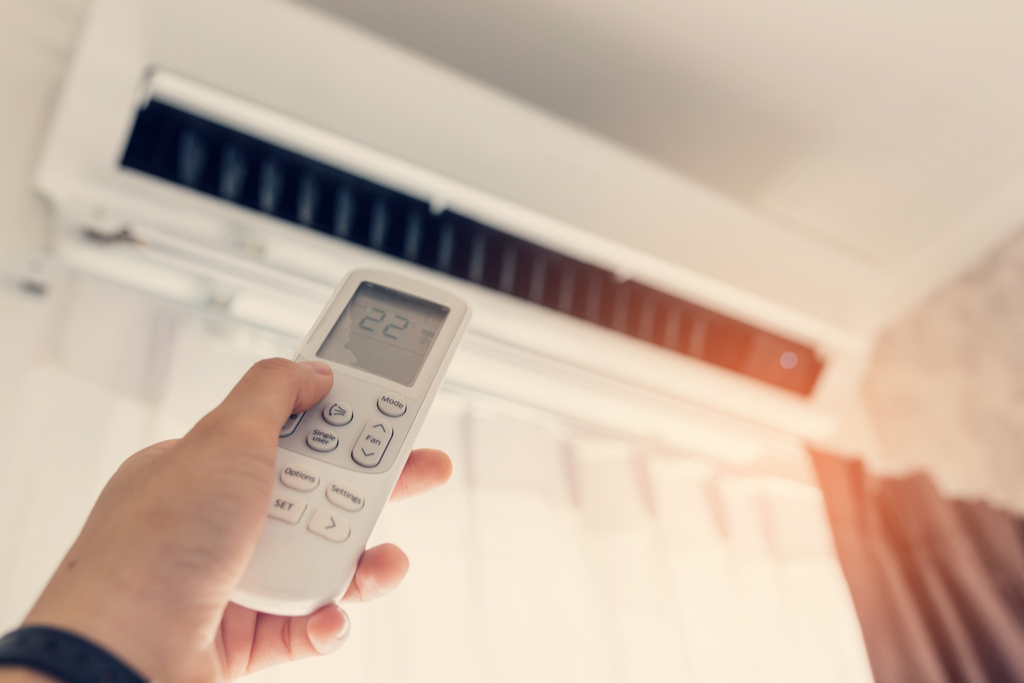
Image Source: kandsac.com
Getting Started: Pre-Activation Checks
Before you even think about pressing a button, a few quick checks can save you a lot of hassle. These preliminary steps are crucial for ensuring your AC unit activation goes as planned and that you’re not dealing with a simple power issue.
H3: Checking the Power Source
The most basic reason an air conditioner won’t turn on is a lack of power. It sounds obvious, but it’s the first thing to confirm.
H4: The Circuit Breaker
- Locate your home’s electrical panel. This is usually in a basement, garage, utility room, or closet.
- Look for a breaker switch labeled “AC,” “Air Conditioner,” or a similar designation.
- If the switch is in the “off” position or in a tripped position (often between “on” and “off”), flip it firmly to the “off” position and then back to the “on” position.
- Important: If the breaker trips again immediately, do not keep resetting it. This indicates a more serious electrical problem that requires a qualified electrician.
H4: The AC Unit’s Own Power Switch
Many outdoor and some indoor AC units have a separate power disconnect switch, often a large lever or box located near the unit itself.
- For the outdoor unit (condenser), this is usually a metal box on the wall near the unit. Open the box to reveal a handle. Ensure this handle is in the “on” or “closed” position.
- For indoor units (furnace or air handler), there might be a switch on the unit itself or near it. Check for a light switch-like toggle.
H3: Verifying Thermostat Batteries
If your thermostat is battery-powered, dead batteries are a common culprit for an unresponsive air conditioning system start.
- Gently pull the thermostat cover off its wall base.
- Check for battery compartments. If it has batteries, replace them with fresh ones, paying attention to the positive (+) and negative (-) markings.
- If your thermostat is hardwired, it likely doesn’t use batteries.
Activating Your Air Conditioner: The Main Steps
Once you’ve confirmed that power is available, you can proceed with starting the air conditioner. The method will depend on whether you have a central air system or a different type of unit.
H3: Using a Thermostat
For most homes with central air, the thermostat is the primary control center. Thermostat operation is key to enjoying cool air.
H4: Identifying Your Thermostat Type
There are several types of thermostats:
- Manual Thermostats: These are the simplest, with a dial or lever to set temperature and fan.
- Programmable Thermostats: These allow you to set schedules for different times of the day and week.
- Smart Thermostats: These connect to Wi-Fi, can be controlled via smartphone apps, and often learn your habits.
H4: Step-by-Step Thermostat Activation
- Locate the Thermostat: It’s usually mounted on an interior wall, often in a central living area.
- Check the Display: Ensure the display is on. If not, check batteries (if applicable) or the main power.
- Set the Mode: Look for a “Mode” button or switch. You’ll want to select “Cool.” Other common modes are “Heat,” “Fan,” and “Off.”
- Set the Fan: Most thermostats have a “Fan” setting.
- Auto: The fan runs only when the cooling system is actively cooling. This is the most energy-efficient setting.
- On: The fan runs continuously, circulating air even when the system isn’t actively cooling. This can help with air circulation but uses more electricity.
- Set the Desired Temperature: Use the up and down arrow buttons, dial, or touch screen to set your preferred temperature. For powering on the AC effectively, set it a few degrees lower than the current room temperature to allow the system to engage.
- Wait for the System to Start: After setting the desired mode and temperature, the system should begin its air conditioning operation. You might hear the outdoor unit (condenser) kick on, followed by cool air blowing from your indoor vents.
H3: Using an AC Remote Control
Many modern air conditioning units, especially split systems, window units, and portable units, come with an AC remote control. This offers convenience and fine-tuned control.
H4: Familiarizing Yourself with the Remote
Each remote is slightly different, but most have common buttons:
- Power Button: Usually a prominent red or green button.
- Mode Button: To select Cooling, Fan, Dry, or Heat.
- Temperature Up/Down Buttons: To adjust the set temperature.
- Fan Speed Button: To cycle through low, medium, high, or auto fan speeds.
- Swing/Vane Button: To control the direction of airflow.
- Timer/Sleep Button: For scheduling operation.
H4: Step-by-Step Remote Activation
- Ensure the Unit is Powered: Check that the indoor unit (if applicable) has power. For window or portable units, make sure they are plugged into a working outlet.
- Point the Remote at the Unit: Aim the remote directly at the sensor on the AC unit.
- Press the Power Button: A light on the unit should illuminate, indicating it has received the signal.
- Select “Cool” Mode: Press the “Mode” button until the cooling icon (often a snowflake or the word “Cool”) is displayed on the remote or the unit’s display.
- Set the Desired Temperature: Use the temperature adjustment buttons to set your preferred cooling level.
- Adjust Fan Speed (Optional): Choose a fan speed that suits your comfort. “Auto” is often a good default.
- Observe the Unit: You should soon feel cool air being discharged from the unit.
H3: Direct Unit Controls (Less Common)
Some simpler AC units, like basic window units, may have controls directly on the unit itself, without a remote.
- Locate the control panel on the front or side of the unit.
- Find the power button or switch.
- Select the “Cool” mode.
- Adjust the temperature and fan speed using the dials or buttons provided.
Troubleshooting Common Activation Issues
If your air conditioning system start doesn’t happen as expected, don’t panic. Many issues are minor and easily resolved.
H3: The Unit Won’t Turn On At All
- Check Power: Revisit the circuit breaker and the AC unit’s disconnect switch.
- Check Thermostat Batteries: If applicable, ensure fresh batteries are installed correctly.
- Check Remote Batteries and Signal: Ensure remote batteries are good and you’re within range and pointing directly at the unit.
- Thermostat Settings: Make sure the thermostat is set to “Cool” and the temperature is set lower than the current room temperature. If the difference is too small, the compressor may not engage.
- Delay Timer: Some modern systems have a built-in delay (usually 3-5 minutes) to protect the compressor after power has been restored or after a previous shutdown. Wait a few minutes and try again.
H3: The AC Turns On, But No Cool Air
- Dirty Air Filter: A clogged air filter severely restricts airflow. Check and replace or clean your filter. This is a vital part of air conditioner maintenance.
- Outdoor Unit Issue: The outdoor unit (condenser) might not be running.
- Check if the fan on the outdoor unit is spinning.
- Listen for the compressor sound.
- Ensure the outdoor unit isn’t blocked by debris or vegetation, which can cause it to overheat and shut down.
- Incorrect Mode: Double-check that the thermostat or remote is definitely set to “Cool” and not just “Fan.”
- Refrigerant Leak: If the unit is running but not cooling, it might be low on refrigerant. This is a job for a professional.
H3: The Fan Runs, But Not the Compressor
- Thermostat Setting: Ensure the temperature setting is sufficiently below the ambient room temperature.
- Capacitor Failure: The capacitor in the outdoor unit helps start the compressor. If it fails, the compressor won’t run. This requires professional repair.
- Control Board Issues: A faulty control board in the indoor or outdoor unit can prevent the compressor from engaging.
Advanced Operation and Features
Once your AC is running, you might want to explore its features for better comfort and efficiency.
H3: Understanding Fan Settings for Efficiency
- Auto: The fan cycles on and off with the cooling system. This uses less energy and reduces unnecessary air circulation.
- On: The fan runs constantly. This can help equalize temperatures throughout the house and improve air quality if you have an air purifier integrated. However, it uses more electricity and can sometimes dehumidify the air too much, making it feel cooler than the thermostat setting.
H3: Using Programmable and Smart Thermostats
- Programming Schedules: Set your thermostat to raise the temperature when you’re away or asleep and lower it before you wake up or return home. This significantly reduces energy consumption.
- Smart Thermostat Features:
- Remote Access: Control your AC from your smartphone, even when you’re not home.
- Learning Capabilities: Some smart thermostats learn your habits and automatically adjust the schedule.
- Energy Reports: Track your energy usage and identify areas for savings.
H3: The Importance of Proper Temperature Settings
- Setting your thermostat too low doesn’t make your home cool faster; it just makes the system run longer and consume more energy.
- For optimal comfort and efficiency, aim for a temperature between 72-78°F (22-26°C) when you are home.
- Each degree you raise the thermostat can save you 1-3% on cooling costs.
Essential Air Conditioner Maintenance
Regular air conditioner maintenance is crucial for efficient air conditioning operation, longevity, and preventing breakdowns, especially after starting the air conditioner each season.
H3: Filter Replacement/Cleaning
- Frequency: Check your air filter monthly and replace or clean it every 1-3 months, depending on the filter type and household conditions (pets, allergies, etc.).
- Impact: A clean filter ensures proper airflow, improves air quality, and prevents strain on the system. This is one of the most impactful AC maintenance tasks.
H3: Cleaning the Outdoor Unit (Condenser)
- Clear Debris: Remove leaves, grass clippings, and other debris that may have accumulated around and on the unit.
- Clean the Fins: Gently spray the fins with a garden hose from the inside out to remove dirt. Be careful not to bend the fins.
- Trim Vegetation: Ensure bushes and plants are at least two feet away from the unit for proper airflow.
H3: Checking the Indoor Unit (Evaporator Coil)
- The evaporator coil is usually located within your furnace or air handler.
- While this is often best left to professionals during annual servicing, be aware that dirt buildup here significantly reduces efficiency.
H3: Professional Servicing
- Schedule a professional tune-up annually, ideally in the spring before the cooling season begins.
- A technician will check refrigerant levels, clean coils, inspect electrical connections, lubricate parts, and ensure the entire air conditioning system start and operation is optimal.
Summary of AC Activation Steps
Let’s recap the essential steps for how to operate AC and ensure a successful AC unit activation:
- Confirm Power: Check the circuit breaker and the AC unit’s dedicated power switch.
- Prepare the Thermostat/Remote: Install fresh batteries if needed. Ensure your remote has a clear line of sight to the unit.
- Set Thermostat/Remote:
- Select the “Cool” mode.
- Choose your preferred fan setting (Auto is recommended for efficiency).
- Set the desired temperature a few degrees below the current room temperature.
- Verify Operation: Listen for the outdoor unit to start and feel for cool air from the vents.
- Monitor: Allow the system a few minutes to stabilize.
By following these steps, you can confidently turn on your air conditioner and enjoy a comfortable environment. Remember that consistent air conditioner maintenance will ensure your system runs efficiently and reliably for years to come, making every starting the air conditioner experience a smooth one.
Frequently Asked Questions (FAQ)
Q1: My AC won’t turn on. What’s the first thing I should check?
A1: The very first thing to check is your home’s circuit breaker panel to ensure the breaker for your air conditioner hasn’t tripped. Also, check for any specific power disconnect switches located near the indoor or outdoor AC units.
Q2: How long should I wait after turning on the AC before I feel cool air?
A2: Typically, it takes a few minutes. You should hear the outdoor unit (condenser) kick on first, followed by cool air being pushed through your vents within 5 to 15 minutes. If it takes much longer or never happens, there might be an issue.
Q3: Is it better to leave the fan on “Auto” or “On”?
A3: For most homeowners, leaving the fan on “Auto” is more energy-efficient. The fan only runs when the cooling system is actively working to cool the air. Setting it to “On” means the fan runs continuously, using more electricity and potentially over-dehumidifying the air.
Q4: Can I adjust my thermostat settings while the AC is running?
A4: Yes, you can adjust your thermostat settings at any time. If you lower the temperature, the system will run longer to reach that new, colder setting. If you raise it, the system will stop cooling once the current temperature is reached and will only restart when the room temperature rises above your set point.
Q5: What does “setback” mean on a programmable thermostat?
A5: “Setback” refers to raising the temperature setting on your thermostat for periods when you are away from home or asleep. This conserves energy. A “recovery” period is when the thermostat automatically lowers the temperature again to your preferred comfort level before you wake up or return. This is a key aspect of efficient thermostat operation.
Q6: My AC blows air, but it’s not cold. What could be wrong?
A6: This is often due to a dirty air filter restricting airflow to the evaporator coil, preventing it from cooling properly. It could also indicate a refrigerant leak or an issue with the compressor. Checking and replacing the air filter is a simple AC maintenance task you can do yourself. If the problem persists, it’s time to call a professional.
Q7: How do I know if my AC unit has a separate power switch?
A7: Look for a metal box with a lever or a large switch mounted on the wall near your outdoor condenser unit. For indoor units (furnaces/air handlers), there might be a switch on the unit itself or on a nearby wall, often resembling a light switch. This is an important part of powering on the AC safely.
Q8: What are the benefits of smart thermostats for AC operation?
A8: Smart thermostats offer remote control via smartphone apps, allowing you to adjust your AC from anywhere. They can also learn your schedule, optimize energy usage through intelligent programming, and provide energy usage reports, helping you save money and reduce your environmental impact. This enhances overall air conditioning operation.
My name is Carlos Gadd, and I am the creator of AirPurityGuide.com.. With a passion for footwear, I share my experiences, insights, and expertise about shoes. Through my blog, I aim to guide readers in making informed decisions, finding the perfect pair, and enhancing their footwear knowledge. Join me on this journey to explore everything about shoes!